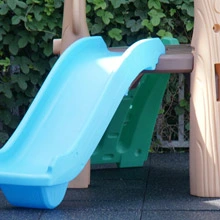
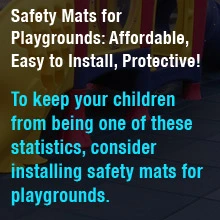
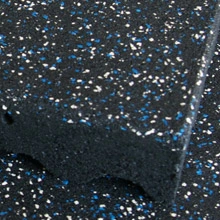
When building playgrounds, install a rubber mat for playground safety. The safest playground flooring is made of rubber because rubber is durable, shock-absorbent, slip-resistant, and water-resistant. As a child, it’s a common fantasy to have your own theme park, right in your backyard. This dream might depict the image of a luxurious playground, decked with all the accouterments. Often enough, parents turn backyard play-area ideas into reality by building playgrounds. After all, a residential playground promotes physical activity and family bonding. But, we’re aware that building playgrounds can seem seriously intimidating. This is especially true for those who have little experience building playgrounds. We’re here to let you know, though, that building playgrounds is not as complicated as it appears. Most playsets come prefabricated and painted, requiring only the insertion of the right screws in the right places. Looking at your playset’s manual, it’ll feel like you’re building oversized Legos—simple and fun.
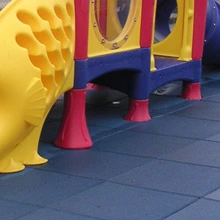
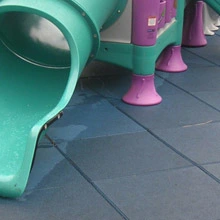
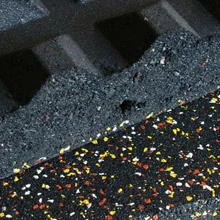
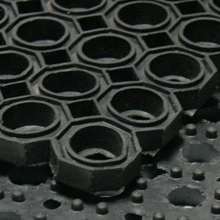
Deciding between the many outdoor playground flooring options is what stumps most homeowners. It's difficult to commit to a surfacing material, especially if it’s your first time building playgrounds. Thankfully, your decision is made easier with the knowledge that rubber is one of the best materials available for outdoor play matting. With a rubber floor, playground equipment is made much safer. Installing rubber mats for playground equipment minimizes the risk of an accidental fall turning into a serious injury. Since children are jumping off swing sets, racing down slides, and running every which way, it’s especially important to have a rubber mat for playground safety. It is important to install safety play surfaces underneath all play structures in accordance with the U.S. Consumer Product Safety Commission’s (CPSC) standards. When sifting through playground surface ideas, it’s clear that rubber play-area tiles are quickly becoming the most recommended product due to their ease of installation, durability, and safety enhancements. Rubber mats for playgrounds are often interlocking—very easy to assemble yourself. There are several steps, however, to installing rubber play-area tiles successfully. We’ve outlined those steps below:
How Do You Install a Playground Rubber Mat?
To install a playground rubber mat, first, pick the spot. Second, dig a space deep enough for rubber playground tiles. Third, smooth and level the area on which you’ll place the rubber mats. Fourth, layer your weed barrier over the dirt. Fifth, smooth and level the area again. Sixth, insert your rubber tiles into the space, joining them using connector pins. But, you may still be wondering: How do you install a playground rubber mat? Don’t worry. Here is a step-by-step, detailed guide on how to install a playground rubber mat:
1. Pick the Spot: Allocate space for building playgrounds. You must decide where you will place each rubber mat for playground equipment. From here, determine how many rubber tiles you will need for this space. You should know which rubber playground tile you’re getting, but in general, rubber tiles are 20-by-20 inches. Due to their thicknesses, many rubber playground pads come with edge-piece ramps so that your rubber mat for playground safety is seamless at its edges. These ramps are highly recommended to prevent children from tripping when they run onto the play-area floor.
2. Prepare the Area: Before any tiles are placed, excavate a layer of dirt from the surface of your playground site. The excavated layer should be at least four-inches deep, but you should adjust this depth according to the thickness of your play-area rubber matting. Set aside the displaced dirt, as you will need it in a later step.
3. Compact the Dirt: Compact the dirt within the space you’ve just dug. This ensures that the surface will be smooth and even. To do this, remove any large mounds of debris. Dampen the surface of the dirt that you want to compact. Do not oversaturate the dirt, though, for it will become muddy and difficult to manipulate. Furthermore, ensure you uniformly saturate the entire area so that wind cannot alter your working space. Then, tie a string such that it hangs above your workspace and that it’s perfectly horizontal. Setting up multiple lines like this will prove helpful. As you level the surface of the pit, use the distances between the strings and the surface to calculate whether the surface is level. Repeat this step as many times as you need to when building playgrounds.
4. Use a Weed Barrier: Unroll your weed barrier onto the area you’ve just leveled. Following the instructions of your chosen weed barrier, ensure that it has been properly installed. A weed barrier prevents overgrowth from piercing your rubber mat for playground equipment.
5. Re-Compact the Dirt: Once you’ve installed your weed barrier, refill the excavated area with the displaced dirt you set aside. Using the method in step three, smooth and level the refilled pit.
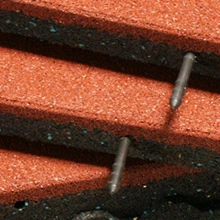
6. Insert Connector Pins: After laying your first tile down, insert connector pins into the holes on the side of the tile. Connector pins make building playgrounds with rubber play-area-mats very simple. Whether you’re installing a rubber mat for playground equipment above concrete or dirt, connector pins work just the same. With the first tile pinned, grab your second tile, and insert the old tile’s pins into the new tile’s holes. We recommend using a rubber mallet to secure the pins. Repeat this process until the demarcated area is completely covered in playground rubber tiles.
7. (Optional) Cutting the Rubber Tiles: If you’d like a seamless rubber playground-flooring, you can custom cut a sheet of rubber playground-matting. Simply, measure the area of the space you intend to cover, then—using drawn lines—mark that area out onto your playground cover. Using a standard utility knife, cut along the lines you’ve marked, taking care to cut across the entire tile in one movement. Due to the thickness of the play floor mat, you will not cut through your rubber mat for playground safety on your first slice. Continue this method until you’ve cut through the entire thickness of the soft outdoor flooring. If you’re having trouble cutting through your rubber playmats, don’t worry. Rubber possesses a high coefficient of friction, making it sometimes difficult to be cut smoothly. To solve this problem, you can dip your knife into a soapy solution, lubricating the way forward as you glide your knife through the material.
8. (Optional) Attaching Edge-Pierce Ramps: If you want to remove the instant change in elevation between your rubber mat for playground safety and your backyard’s default surface, you can attach ramps to the edges of the mat. It’s a small adjustment that tends to give the entire playground a sleeker appearance. And many parents, when building playgrounds, prefer to have these ramps because they make playgrounds safer—the edges of the playground are no longer trip hazards.
What is the Safest Playground Flooring?
The safest playground flooring is rubber because rubber is durable, shock-absorbent, slip-resistant, and water-resistant. Choose rubber mats for playground safety, for they minimize the risk of an accidental fall becoming a serious injury. Now that you know what is the safest playground flooring, we hope that our guide makes building playgrounds easier for you. You and your kids will surely love your new playground.