Cutting rubber is easier than you think. There is a proper way of doing it so that you don’t damage your material or—worse—damage yourself. Learning how to cut rubber will help you avoid professional alteration fees. But, it’s not just about knowing how to cut rubber—it’s about knowing how to cut rubber properly. This way, you will end up with an elastomeric sheet that isn’t just more affordable overall, but is also cleanly cut. Whether you have thin sheet rubber or a heavy-duty rubber sheet, our DIY method will be just as effective, no matter the thickness of your soft rubber sheet. By learning how to cut rubber, there will be no need to seek out the additional help of rubber product suppliers, rubber roll manufacturers, or any other rubber-producing entity. Importantly, though, if your project requires dye-cutting or water-jet cutting you should definitely contact your rubber roll manufacturer and request further assistance. Otherwise, can rubber be cut easily? You’ll soon find out! This guide is for the non-professional looking for a do-it-yourself solution. Follow our guide below to ensure your mat is cut correctly.
What Is the Best Tool to Cut Rubber?
A sharp utility knife is what is the best tool to cut rubber. This tool is highly accessible because it’s relatively affordable. And it does the job well. To give you a better idea of what you’ll need as you begin your project, below is a list of required materials. As with most DIY projects, this list of materials is short, and its items are both affordable and accessible. These are the materials you will need:
1. Sharp Utility Knife: A fixed blade works better than a retractable utility knife. Be sure the blades are sharp, not dull. The sharper the blade, the smoother the cuts; the smoother the cuts, the quicker and safer the project. You may want to have blade replacements or a blade sharpener at hand in case repeated cuts dull your blade.
2. Chalk: It’s always best to mark the line with something that can be easily seen and washed off. We recommend marking the line with chalk and washing the chalk off once you’re done. Avoid using more-permanent methods of marking, like pens or sharpies, since these lines are meant to be temporary guides and not permanent decorations!
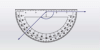
3. Straight Edge: You will need a straight edge to ensure that your drawn line is straight, as well as to guide your stroke when cutting rubber. Conducting this step well is the key to producing a smooth- and straight-edged sheet of rubber. A yard- or meter-stick will work fine, but we recommend using one made out metal, as metal is more robust than other typical ruler materials. Combined, these factors make for a more consistent cutting experience and final product.
4. Gloves: Having a pair of protective gloves is imperative to protect yourself from your sharp blade. As a standard, employees of rubber sheeting suppliers always use gloves when cutting rubber (sheet), so you probably should too.
5. Soapy Water: This one might seem odd, but it’s a really valuable item to have on hand. Sometimes, you’ll be working with a flat rubber sheet with an exceptional thickness, such as rubber 2-inches or rubber 1-inch thick. In these cases, the black rubber roll may be too difficult to be cut cleanly—jags of rubber might stick out of your sheet’s sides. That’s where the soapy water comes in. You can dip your blade into the soapy solution prior to cutting, thereby coating the knife in a quasi-lubricant that reduces the amount of resistance your knife experiences as it traverses the rubber.
What Is the Best Way to Cut Rubber Mats?
The best way to cut rubber mats is by laying the mat on the ground, marking a line representing the cut you want to produce, then cutting along this line as many times as needed. For more detail, we’ve outlined this process in a simple, four-step guide on how to cut rubber. Our method is definitely what is the best way to cut rubber mats.
1. Lay the mat flat on the ground. Then, using a straight edge, mark your knife’s intended pathway. Do this several times until the line is visible, as well as straight.
2. Now, firmly place your straight edge on this line, and use your sharp utility knife to score the line two to four times. Cutting rubber can take longer for thicker materials so you may need to score it more than normal. And remember, if you need to, dip your knife in a soapy solution.
3. Next, grab the rubber sheet by its edge that’s closest to the line you’ve just cut. Lift this edge, and bend it toward you. Where you’ve cut, the rubber sheet should open like a ravine fracturing the ground. And if you’ve done it right, the opened cut should look straight and smooth.
4. Lastly, lay the mat back flat on the ground, and score the line a few more times—working until the cut is complete.
Can Rubber Be Cut Easily?
Barring a few exceptions, rubber can be cut easily—especially if you follow our guide on how to cut rubber. Cutting rubber with these instructions will surely give you a clean-looking mat. With a bit of practice, you’ll be able to do just as well as the rubber product suppliers from whom you obtained your rubber roll material in the first place. Now that you’ve learned how to cut rubber using only four easy steps, the next time you need to cut rolled rubber, it’ll be a piece of cake!