|
|
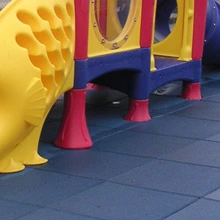
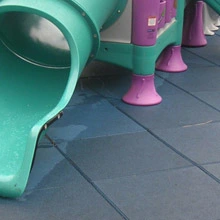
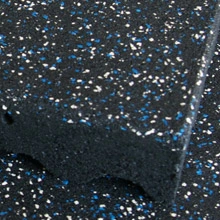
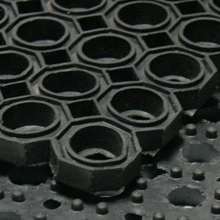
Interlocking rubber playground tiles make it simple and easy to create safe and soft playground surfaces both indoors and outdoors. With their interlocking mechanism, playground surface tiles make it easy to customize the size of your playground surface simply by adding or removing tiles. Not only are the playground safety mats easy to install, but they are also excellent safety products for children. Soft playground surfaces can be placed over various subfloors, including grass and dirt, to help ensure a soft and safe surface for children in case of a tumble. Furthermore, outdoor play surfaces may use the assistance of a weatherproof adhesive over wood or concrete to help keep the tiles in place through harsh weather conditions; however, the weight of the tiles themselves is generally enough to keep the surface secured in place.
How Do You Install Rubber Tiles for a Playground?
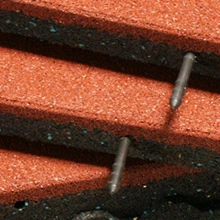
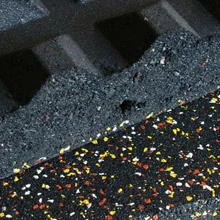
You install rubber tiles for a playground by connecting the tiles together with small connector pins through the holes that line the sides of each tile. Generally, interlocking rubber playground tiles can be installed without the use of any adhesives; however, for a permanent and weatherproof installation for outdoor play surfaces, a polyurethane-based glue is recommended. It is important to remember that a glue installation can only take place on hard surfaces, such as wood or concrete, and cannot create a secure installation on surfaces like grass or dirt. To install interlocking rubber playground tiles, simply connect the tiles together through the holes that line each tile with small plastic connector pins. Continue adding tiles until you have reached the necessary size for the playground. In addition, interlocking rubber playground tiles are generally 3/4" to 3” thick, so it is important to add ramps to the raised edges of the playground surface tiles to prevent tripping hazards as children run onto the playground. Thanks to their interlocking mechanism, playground surface tiles offer a customizable sizing option that is fully dependent on the number of tiles used to create the surface. You may further customize your playground surface with the use of a standard utility knife and a straight edge (i.e., a yard stick or meter stick). Make sure the straight edge is something long enough to cover the entire length of the surface being cut to ensure a straight cut all the way across. With the use of rubber playground safety mats, it is easy to create safe and soft playground surfaces both indoors and outdoors.

|
|
-
(a) Can You Put Rubber Mats on Grass?
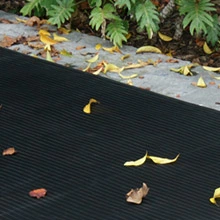
You can put rubber mats on grass without any adhesives; however, a weed barrier and a border are necessary to prevent greens from growing through the playground surface and to keep the tiles in place. In fact, it is highly recommended to put rubber mats on grass for safety purposes. Grass, whether natural or synthetic turf, is not a recommended playground surface because it does not have any shock absorbing qualities. Case in point, “grass and turf are not recommended because wear and environmental conditions can reduce their effectiveness in absorbing shock during a fall” (cpsc.gov). The amount of cushioning grass can offer is very limited and can easily be altered by changing weather conditions and levels of foot traffic. Interlocking rubber playground tiles can be installed on grass with the use of the small plastic connector pins that are inserted into holes that line the sides of each tile to connect one tile to another. Before the tiles can be laid out on the grass, it is important to lay a weed barrier over the intended surface to prevent plants from growing through the playground surface. You will also need to make sure the ground is well compacted, and that drainage of the area is planned out. Furthermore, because adhesives cannot be used to install the interlocking rubber playground tiles on grass, it is important to create a border around the surface to not only prevent the surface from moving and to prevent tripping hazards over an uneven surface, as the tiles can reach thicknesses up to 3”.
(b) Can You Put Rubber Mats Over Dirt?
You can easily put rubber mats over dirt by making sure the dirt is compacted, adding a weed barrier, and border around the tiles to keep them in place. You do not need any adhesives to install, but it is important to lay playground surface tiles over well-compacted, even dirt. First, you will need to remove a layer of dirt as thick as the tiles, then compact the dirt in the area the layer of dirt has been removed. Then, lay out a layer of weed barrier to prevent weeds from growing through the tiles. Next, you will then put layer of dirt back on top of the weed barrier and compact that as well to create a flat surface. Finally, you will need to assemble the interlocking rubber playground tiles over the compacted dirt and create a border around the tiles to help keep them in place since the use of adhesives is not possible. The sheer weight of the tiles along with a border around the surfacing tiles will keep them in place without the use of any adhesives.
Is Rubber Flooring Easy to Install?
Rubber flooring is easy to install with little to no equipment required. Rubber flooring for playgrounds comes in the form of interlocking rubber playground tiles that are easily connected with plastic pins through the small holes that line the sides of each tile. Simply use the pins to connect the tiles together through the holes that line the sides of each tile and keep adding on tiles until you have reached your desired size. Do not forget to add the ramps to the edges of this surface to prevent children from tripping over the uneven surface. You may leave your rubber playground tiles loose laid or you may use a polyurethane-based glue for hard outdoor play surfaces where they may be subjected to harsher conditions. It is important to remember that glue can only be used on hard, flat surfaces, such as wood or concrete.

|

|
-
(a) Does Rubber Flooring Need to be Glued Down?
Rubber flooring does not need to be glued down but you may use polyurethane-based glue for permanent or weatherproof installations on smooth surfaces, such as wood and concrete. Generally, interlocking rubber playground tiles do not need to be glued down because they are heavy enough to stay in place themselves. A rubber playground tile weighs about 10-28 lb. each and the ramp tiles that are used on the edges of a playground surface weigh about 10-21 lb. each; however, permanent installations or for installations that are in abrasive settings may be glued down with a polyurethane-based glue. Settings like this include outdoor play surfaces where they will be exposed to harsh elemental factors. Outdoor surfaces, such as grass or dirt, are not suitable for glue installations because they are not flat or hard surfaces. A polyurethane-based glue is the ideal adhesive for outdoor settings due to its “high resistance to weathering and environmental influences” (resin-expert.com). Although interlocking rubber playground tiles do not need to be glued down, outdoor play surfaces can benefit greatly from the use of a weatherproof polyurethane-based glue.
Playground surface tiles are a customizable playground surfacing option that is easy to install using little to no equipment. Interlocking rubber playground tiles are installed using the small connector pins that come with the tiles. You may use a double-sided tape adhesive for semi-permanent indoor play surfaces, or you may use a weatherproof polyurethane-based glue for outdoor play surfaces, such as wood and concrete; however, adhesives are not required as the sheer weight of the interlocking rubber playground tiles will keep them in place. Rubber is the ideal indoor/outdoor material for creating playground surfaces due to its excellent shock absorption and environmental resistance properties. Therefore, interlocking rubber playground tiles are the ideal materials for creating soft playground surfaces that are safe for children.
How Do You Install Rubber Tiles for a Playground?
|
|
|